So, you want to propagate some poinsettia from cuttings in your garden.
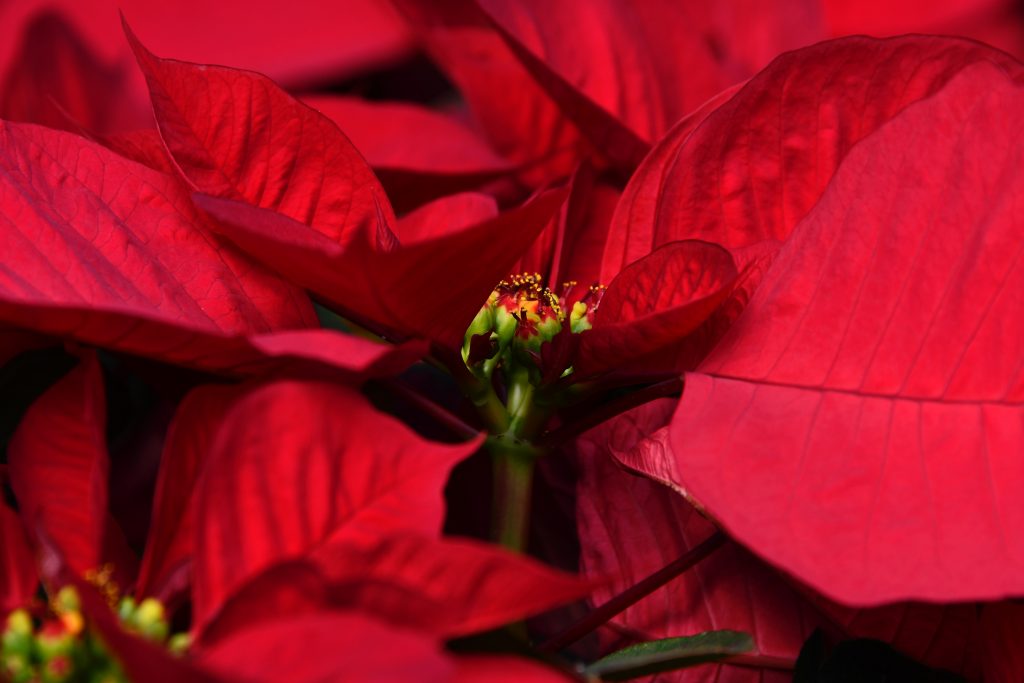
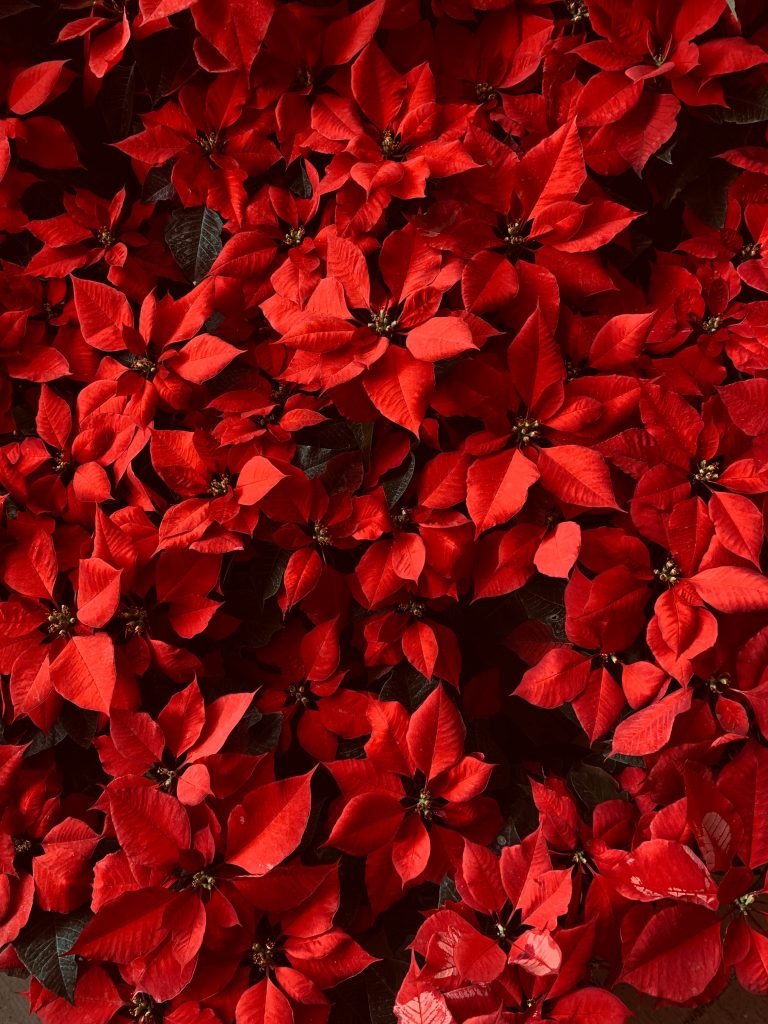
When the holidays roll around, poinsettias are the most popular plant of the season.
These professionally grown plants are often raised from cuttings, so the offspring plants are exact clones of the original.

This is why all poinsettias look nearly identical- with those green leaves and red flowers.
But what about for the average, casual gardener who doesn’t have a greenhouse full of 1200 plants to propagate?
How can you keep your poinsettia going year after year so you don’t need to buy a dozen new ones during the winter?
It’s possible.
But you should have some years of experience under your belt before you attempt this.
It’s not as easy and straightforward as many other beginner-friendly plants like Bok Choy and Amaryllis.
Propagating poinsettia from cuttings is a bit more complex.
But if you’re dead set on doing this and growing your own, here’s how to do so.
Guide Contents
Quick care guide: Poinsettia
| Plant type | Perennial shrub |
| Origin | Central America |
| Scientific name | Euphorbia pulcherrima |
| Other names | Paintedleaf, lobster flower, Easter flower, Christmas flower, lobsterplant, Papagallo |
| Soil type | Loose, peat-based, well-draining |
| Soil pH | 5-6 (slightly acidic) |
| Sunlight requirement | Partial sun (6 hours) |
| Bloom season | Fall, winter |
| Colors | Green, pink, blue, purple, orange, red, lavender, green, hybrid |
| Max height | 14 feet |
| Max width | 7 feet |
| Temperature | 55-70F |
| Humidity | Very high (90-100%) |
| Watering requirements | Let dry between watering after established, mist often when growing from cuttings |
| Fertilizer requirements | Low (15-0-15, 15-16-17, 20-0-20, 20-10-20, 15-5-15) |
| Days until germination | 7-21 days |
| Days until bloom | 1-2 years |
| Speed of growth | Moderate |
| Hardiness zones | 9, 10, 11 |
| Plant depth | 3-4 inches |
| Plant spacing | 10 inches |
| Propagation | Cuttings, seeds |
| Common pests | Aphids, whiteflies, fungus gnats, shoreflies, spider mites, thrips, nematodes |
| Common diseases | Scab, gray mold, powdery mildew, leaf spot, root rot, Botrytis, Pythium, Rhizoctonia |
| Beginner friendly | No |
| Care level | Medium |
| Uses | Decoration, color, centerpiece, holiday ornamental |
Safety first
Poinsettia is an extremely irritating plant that will hurt your eyes and damage your skin if you don’t wear the proper protective gear.
You’ll need a good pair of garden gloves, long sleeve shirt and pants, and safety goggles. The more layers of protection you have to all exposed skin, the safer you’ll be.
The sap that’s released from the leaves is toxic and can be harmful to any broken skin. Even contact with your regular skin can be irritating. If you have allergies, avoid any contact with this plant.
Let your poinsettia grow
You can’t just jump in and cut whenever you want. Timing is everything.
Poinsettia is best harvested for cuttings from new growth, which occurs around spring to summer. If you try to do this during winter or fall from a poinsettia you bought at Walmart, you’ll struggle.
Although not impossible, trying to propagate using older cuttings is just making it difficult for yourself. Stick with new foliage and stem growth for the best chance of success.
Poinsettia grows through the spring and summer, so this is when it should be harvested for cuttings.
Simply put: Only take cuttings from poinsettia in the spring or summer when it’s actively growing. Otherwise, wait.
Set up your plant container

Next, you’ll need to get your planter of choice for your new poinsettia cutting.
There’s no wrong way to do this as any generic planter works.
You don’t have to get fancy with it unless you want to. You can use anything from an old potter to an upcycled milk jug.
Or you can use a seed starter with a clear dome cover for best success.
It doesn’t need to be huge, as you won’t keep the plant in there forever. It’s just to sprout it and germinate the new cutting in the meantime. If you’re cutting a bunch of them at the same time, choose a seed starter to save space and money.
One thing to keep in mind is that you want to make sure the container you’re using is 100% sterile.
Okay, that’s impossible. But get it as clean as you can.
Use rubbing alcohol and clean the inside of it.
This is important to prevent any bacteria or fungal problems from being transferred from older soil to the new, vulnerable cuttings of your poinsettia.
Choose a soil
The growing medium of choice for professional growers is peat moss. If you visit a nursery that has regular poinsettias for sale, they’ll likely be using peat moss.
Some also use a mixture of potting soil and foam or all three substrates.
When you buy poinsettia from the store, you’ll likely find it sitting in some peat moss for floral foam- both of which are exactly what they are originally grown in.
Floral foam is exactly what it sounds like- it’s a thick, foamy material that’s used for planting or growing plant cuttings or seedlings.
If you choose to use peat moss, get sphagnum peat moss. This can be found in organic varieties at garden centers.
The thing to keep in mind is to make sure whatever you use is sterilized. Don’t recycle soil and don’t reuse previously used substrate.
This may contaminate your poinsettia plant and kill it. If you don’t like peat moss because it’s too messy or can’t find floral foam, you can use coconut husk, coconut coir, vermiculite, perlite, or a generic seed starter. Opt for natural or organic only.
Depending on what substrate you use, you can mix them for a balanced, nutritious growing medium for your cuttings.
Some growing mediums also are made to resist mildew, mold, and help retain moisture. These are super useful to have and will benefit you in the long run.
Save yourself time and maximize your poinsettia rooting success rate by using the right soil.
Prepare the planter
And here’s the fun part. Start by adding 3 inches of your substrate to your container. If you’re planning on cutting longer pieces, you’ll want to add more substrate.
It’s preferable to add more than you need because you can’t go wrong with extra soil. But if you add too little, you’ll have to take out the cutting and redo the whole thing later on.
So be generous and add at least 3 inches per inch of poinsettia cutting. Don’t be cheap.
Use a shovel or spade and smooth out the soil.
Don’t pat it down and don’t compress it. You also don’t need to water it yet.
Choose a vigorous poinsettia to take cuttings from
The poinsettia that you choose will be cloned exactly from the cuttings.
Choose vigorous plants that haven’t flowered yet. Flowered poinsettias have already used their energy on the flowers and the cuttings aren’t 100% ready.
Cut the stems back to allow new growth when you take the cuttings. The original pants should be kept warm, moist, and under the partial sun or bright light. The stems should be at least 4” before you cut.
Each cutting should be only cut from vigorous, green stems.
Cut your poinsettia carefully
Get a sharp pair of pruners or trimmers and sterilize them. Use 70% rubbing alcohol and dip it thoroughly inside it.
This is critical because the tool you use will make contact with the exposed cutting, so you don’t want to take any chances of giving it an infection.
Put on your protective gear. It’s time to take cuttings.
Choose your favorite poinsettia that you want to clone through cuttings.
Find a stem with new foliage that recently grew out of it. Make a clean cut on the stem. The stem is the green part- not the brown part
Don’t cut the branches. The stem should have a flurry of leaves growing out it and it separates from the brown branches.
Cut at least a 3” section off and be careful of any white sap that leaks out of the leaves or stems. This residue is toxic.
After you cut, make another cut off the lower leaves of the section you took off. This encourages new plant growth through the bottom of the stem.
The top of the cutting should have a bunch of leaves. You can trim off all but 3 of them to keep it clean. It doesn’t need to have so many as this just makes your job difficult. It’s the stem we need.
The leaves help it absorb moisture and 2-3 pieces should be enough for a 3” section of the poinsettia.
Repeat the process for as many as you need. You should definitely harvest multiple cuttings because poinsettia won’t have a 100% germination rate.
A lot of cuttings won’t even root. So if you dedicate weeks of work trying to get it to root to no avail, you’ll have to start all over (perhaps even next season) if you don’t have enough cuttings.
It’s a numbers game. The more cuttings you take and plant, the higher chance of successful propagation. I’d suggest anywhere from 6+ cuttings if it’s your first time.
Apply rooting hormone
Get some high-quality rooting hormone to help encourage your new leaves to grow from the cutting.
There are dozens upon dozens of different rooting hormones you can buy. If you have a favorite brand, use it. Try to get something that’s organic so it’s sterile.
Avoid using any hormone that may be contaminated from previous plant propagation. Use as directed.
If you’re new to rooting hormones, you dip the exposed end of the cutting into the rooting powder.
Sometimes it’s a gel that you can apply directly to the stem end. Your poinsettia is set up for success.
Rooting hormones help it grow and establish a root system for the best chance of propagation from cuttings.
Plant it
The last and best part- actually planting your poinsettia cutting.
Take a small screwdriver or chopstick and make holes in your soil substrate. Place the cutting stem into those holes. Pack loosely with soil. It should be able to stand up on its own.
You can also fill the hole with a small bit of rooting hormone if desired. That’s it. Your poinsettia cuttings are all set to grow.
Watering
Poinsettia needs to be watered with a soft mister.
You can use any generic spray bottle, but make sure there are no contaminants, cleaners, or other residues in the bottle if you’re reusing one.
Glass bottles work best because they’re easy to clean. Plastic bags can help maintain the humidity so you don’t need spritzing 24/7. Also, bags will help prevent wilting.
The other important thing to note here is water quality.
Poinsettias are extremely sensitive to water quality. If your water source contains a ton of additives from your water municipality, you’ll want to avoid using that water for your plants.
This is because some areas have contaminated water so they add a bunch of cleaning agents to purify it.
These cleaners will kill your young poinsettia, which can be affected by the additives or the minerals added by the plant.
Use filtered water when possible.
You can do this in many different ways:
- Use a desktop water purifier ($20)
- Buy bottled drinking water ($3)
- Get an under sink water filter ($50)
- Or get a whole house filter ($1200)
Whatever the case, you should get a water quality report from your water district.
You may be surprised at what’s in your water and might want to get it corrected- for both you and your poinsettias.
Poinsettias cuttings need to be misted daily. Spitze the leaves, as that’s where they absorb the moisture. Avoid spraying the soil as you don’t have any reason to- they don’t even have a root system yet so why waterlog the soil?
They absorb water through the leaves, which is why we left them with 2-3 when we took the cutting from the original plant.
Humidity
Keep the humidity levels high.
Poinsettia cuttings will grow and expand their roots when the local ambient humidity is above 95%. You’ll need a contained area to do this, as there’s no way you’re going to keep your entire household at 100% humidity unless you like water damage.
This calls for a greenhouse or humidity dome.
Remember the seed starter we talked about earlier? This is how you keep humidity high.
Or if you have a greenhouse or even a mini one, both will do just fine. Cuttings in pots or containers can be covered with plastic bags.
Sunlight
Keep the cuttings in indirect light. They like bright lights, and you don’t need streaming sunlight through a window to accomplish this.
Even your room lighting can be enough from the scattered sunlight coming in from the blinds.
Or you can use a grow light for plants to give them enough light all day without caring about where you place them.
Provide your plants with a lot of light for the best chance of new rooting cuttings. If the cuttings wilt in light, move to a sheltered location with less light.
Don’t place new cuttings in direct sunlight. Partial light through the windowsill can be enough.
Air circulation
When you keep humidity so high, this can pose a risk of bacteria and fungus.
If there’s no air circulation, then you’re just playing with your plants. If you’re growing your cuttings in a greenhouse, it’s easy to balance humidity and air circulation.
But if you’re using bags or a humidity dome, you’ll have to find a way to blow air while keeping the humidity high. This can be done by constantly misting and adding small fans to move the air.
You’ll need a humidity gauge to monitor the overall levels at all times. A basic desktop fan can help with air circulation.
Additionally, you can add more spacing between your cuttings to help reduce the risk of bacteria or fungal infections.
Using separate containers also helps to isolate them from one another so that even if one gets infected, the others are safe.
Don’t underestimate the power of bacteria to propper in high humidity environments.
This is why you prepare many cuttings simultaneously rather than one at a time. If one doesn’t root, the other poinsettias may root just fine.
Transplanting

Watch the humidity and constantly mist your cuttings.
After 4-5 weeks, your poinsettia cuttings will begin to root. Congratulations. This is a sign of success. The hard part is over!
After they’ve rooted, it’s time to transplant them into planters. Use high-quality well-draining soil and make sure there are drainage holes in the container.
You can use the same soil you used prior. A single 8” pot can handle 2-3 rooted poinsettia cuttings no problem.
This new planter can be any old generic pot- it doesn’t have to be special like the first time around. You can also be laxer about the sterilization process.
This time around, you’ll want to water normally. Add enough water so that it seeps out the drain holes in the bottom of the planter.
But don’t overdo the watering process. The soil surface should be dry before you water again.
The pots can be their home until they begin flowering next autumn. They can be grown outside until temps drop in the fall. Then they need to be moved indoors.
Temperature
Poinsettia does best when the local temps are above 50F.
Keep them outdoors in partial shade. Move them indoors if temps drop below 50F and use a grow light or window sunlight.
A windowsill indoors can provide enough sunlight for the cuttings to form roots.
After the autumn equinox, provide at least 14 hours of no light.
This will help them flower and why they’re called short-day plants. They will flower when days are short (less than 12 hours) and this is also why many people can’ get their poinsettia to flower.
Pruning
Poinsettia cuttings will develop extensive root systems and grow very leggy over time.
The foliage can also be bushy if you don’t maintain, prune, and trim it. You can trim the foliage without harming the plant to keep it tidy and clean looking.
This will also minimize pests and bacterial problems.
Legal issues
Note that some poinsettias are protected by plant patents.
Yes, these exist. And they help the original growers keep their strain only to themselves so that people will continue to buy. If you decide to propagate cuttings, make sure that the plant isn’t protected by a patent.
If you prefer the fuller look, you can cut the shoot tip to help encourage your poinsettia to branch. This can be done by examining the rooted cutting and finding the growing tip.
Next to that, you’ll see a bunch of big leaves. This is from the original cutting when it was a straight stem with just those 2-3 leaves attached to it.
Find it and then cut off the growing tip at the tip of the stem. You can cut off about 1 inch to encourage branching. Your poinsettia will then branch slowly and get that “fuller” look over time.
Cutting off the growing tip helps the plant develop new shoots around those leaf nodes. You double the number of shoots each time you cut it back.
The best time to cut back the growing tip is before September so you can max out the fuller appearance by the holidays.
And that’s all there is to know for starters.
Other FAQs
Here are some commonly asked questions about poinsettia propagation.
Will poinsettia cuttings root in water?
Poinsettia cuttings can root only with the proper substrate. If you float a cutting in a shallow bowl, it may develop roots, but it’s unlikely to successfully develop and propagate.
The proper tried and true process calls for a sterilized cut of a 3″ section, dipped into rooting hormone, and then dipped into water and placed into a mixture of perlite, sand, peat moss, or other high quality growing medium.
Can you rebloom poinsettias?
With proper care and a successful rooting, your cuttings will grow into full sized poinsettias slowly over time. They’ll bloom flowers and match the color of the original plant exactly.
This is the nice part about growing from cuttings- you know exactly what you’re going to get.
How long is poinsettia’s propagation time?
Poisettia will germinate within 1-2 weeks, which is quite speedy. To fully grow and bloom those signature red flowers will take much longer- often up to many years.
A fully grown poinsettia can appear leggy or bushy if not pruned. If you cut the growing tip, it’ll branch even more. This plant can be reach heights of up to 10 feet!
Further reading
Here are some references you may find helpful:
- Can potted ‘christmas poinsettias’ be ‘saved’ and kept? – Reddit
- Poinsettia Plants – Illinois University
Did you propagate your poinsettia?
You now have all the basics down on propagating poinsettia from cuttings.
The process is more complex compared to other decorative ornamentals, but the result is that you don’t have to buy them every year from the store just to celebrate the holidays!
If you’re new to gardening, don’t be afraid to give it a try. It’s all a learning experience and you can gain some experience just from the process. I bet you already saw something you had no idea about in this guide.
It all comes down to choosing the right substrate, minimizing bacteria/fungal problems, keeping humidity high, and taking cuttings at the right time.
What do you think? Are you going to give it a try? Do you have specific questions?
Or have you done this before and have some words of wisdom for others? Post a comment and let me know.

I’ve always been interested in gardening, but I never took it seriously until I was forcefully gifted an orchid. This was what got me into the hobby and I’ve never looked back. I enjoy writing about it, but not nearly as much as getting into the dirt and sculpting the perfect decorative ornamental to enjoy for the times.
I am going to give it a go.
Sandy B
For someone who has been wondering why I can’t get poinsettia to propagate this is such a good, real (truthful) guide. thankyou!