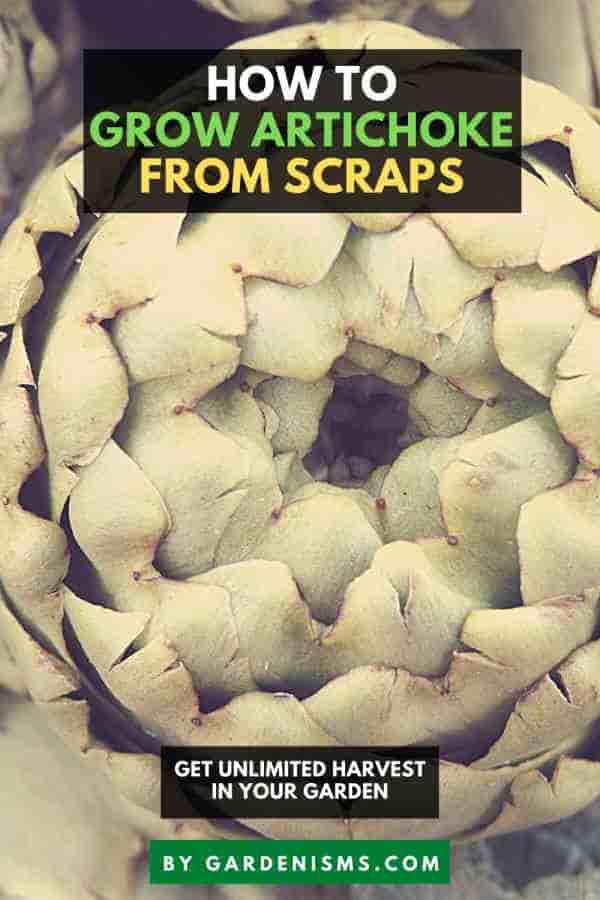
Growing artichokes from artichokes is quite simply, a rewarding experience.
Even though not many people may be fans of this thistle, C. carunculous can easily be grown at home for fans of it juicy, bitter flavor.
Find out how to grow it yourself.
Spoiler alert: If you want to propagate it using store bought produce, you’ll be limited to Jerusalem artichoke.
Other varieties, like globe artichoke (the one you see at supermarket), will require that you have a fully grown one to get cuttings from.
If you don’t have one, consider asking a friend or neighbor. Or buy one. Or buy a packet of seeds.
We’ll cover all the different methods to grow, care, and propagate artichoke so you can reap the fruits of your labor.
(Veggies, in this case!)
Guide Contents
Quick care guide: Artichokes
| Plant type | Perennial |
| Origin | Africa, Italy |
| Scientific name | Cynara cardunculus |
| Other names | French artichoke, globe artichoke, green artichoke |
| Soil type | Loamy, clay, sandy, generic, well-draining |
| Soil pH | 6.0-7.5 (slightly acidic to neutral) |
| Sunlight requirement | Full sun, partial sun in hot climates |
| Bloom season | Spring, summer |
| Colors | Green, yellow, purple |
| Max height | 5 feet |
| Max width | 6-8 feet |
| Low temperature | 20F |
| High temperature | 80F |
| Ideal temperature range | 60-70F |
| Humidity | Moderate |
| Watering requirements | Often during first year of growth, spring, and summer. Reduced after established. |
| Fertilizer requirements | High |
| Fertilizer NPK | 5-5-5 |
| Days until germination | 2-3 weeks |
| Days until bloom | 1-2 years |
| Speed of growth | Moderate |
| Hardiness zones | 7, 8, 9, 10, 11 |
| Plant depth | 0.5 inches (seed) |
| Plant spacing | 3-6 feet |
| Propagation | Seeds, division, root cuttings |
| Common pests | Aphids, thrips, leafminers, gastropods, plume moths, caterpillars, beetles, weevils |
| Common diseases | Root rot, powdery mildew, drawf virus, damping off, Botrytis |
| Indoor plant | No |
| Outdoor plant | Yes |
| Grown in container | Yes |
| Flowering plant | Yes |
| Beginner friendly | Yes |
| Care level | Medium |
| Uses | Culinary, stew, soup, decor, fresh cut, farming, produce |
Can you grow artichokes from scraps?
You can, depending on what you mean by “scraps.”
But that’s why you’re here, right?
You’ll be glad to know that you can definitely regrow artichokes from their cuttings in the roots.
They produce buds that stick out which can be cut off and then replanted to grow new artichoke. In other words, you can grow artichokes from artichokes.
But if you’re referring to buying one from the grocery store and then replacing it, it’s not gonna work unless you’re only planting Jerusalem artichokes.
They can be regrown. But traditional ones can’t. You’ll be using the crown to regrow it.
What is an artichoke crown?
The crown is where the offshoots, or buds, will stem out of.
You can regrow it by using these pups in a new plot of soil. When people say they use the crowns to propagate it, they’re referring to these parts of the plant.
The crown is usually at the soil level and can be seen if you dig around the part where the leaves part from the earth.
The crown is sensitive and can easily be destroyed by rot, so don’t poke at it unless you need to. The pups can be separated from the crown by using pruners.
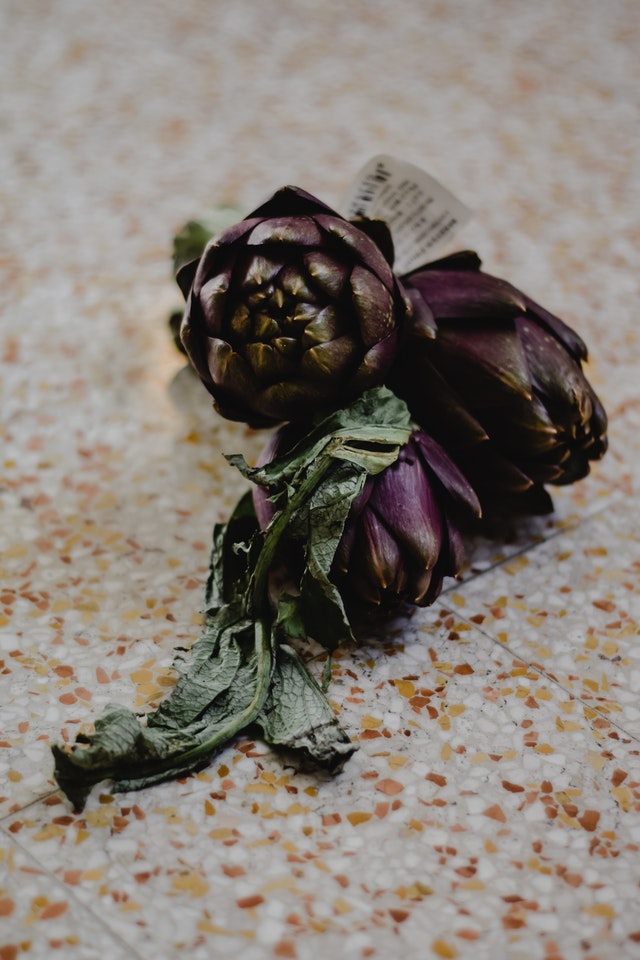
Types of artichokes
Here are some of the most popular artichokes that you can grow at home:
- Green globe (the most popular cultivar sold in the grocery)
- Jerusalem (can be grown from the store)
- Siena
- Violetta
- Baby Anzio
- Castel
- Chianti
Note that artichokes come in multiple sizes, depending on when they’re harvested: baby, medium, and jumbo. Depending on the type you grow, you may be limited to just a few sizes.
Are they easy to grow? Good for beginners?
Artichoke does require a bit more care vs. other “set and forget” veggies like Mexican tarragon, bok choy, raddichio, eggplant, or even Japanese mitsuba. But once you get it going, it’s self-sustainable.
It does have some temperature requirements you need to watch out for (sensitive to cold- they’re not cold hardy). They also need plenty of water, so you’ll need to keep it consistent. Lastly, they’re heavy feeders.
A steady stream of fertilizer is necessary for the best yield. They’re’ not hard to grow, but they’re a bit more “hands-on” compared to other plants. Regardless, artichokes are a good project for beginners.
Can I plant artichokes from the grocery store?
Yes, you can.
But you’re limited to only Jerusalem artichokes, which will grow like weeds if you give them the love they need.
As for traditional artichokes, you can’t. You’ll need to either propagate them from seed, root cutting, or from the nursery as a transplanted plant.
If you want to start with Jerusalem artichokes, here are a few tips on selecting one for propagation:
- Choose artichokes that have no spots or wilting
- They should be firm, not soft
- There should be no nicks or cuts
- Look for smooth surfaces
- Choose a reputable grocery store
And here’s a video of Jerusalem artichokes being planted:
Jerusalem artichokes are also known as sunchokes, while the traditional ones you see in the store are called globe artichokes. These are two different types of classifications so you should know the differences.
About patented plants
Some artichokes may be patented by the grower. This means you can’t propagate it yourself without permission, and that’d be illegal.
If you see stickers on it, or the product label, you should avoid trying to grow it. Consult with the growers to confirm you’re not growing an illegal plant when in doubt.
How to grow an artichoke from an artichoke
So here’s the real meat of the guide. If you have a root cutting that’s fertile and not sterilized, you have everything you need.
Well, other than your favorite pair of garden gloves and a spade.
Whether you’re in San Diego or Dallas, there are ways to grow artichoke.
Let’s get started.
Get your starter artichoke offshoots
You can typically use any artichoke offshoot from an established plant.
If you already have an artichoke production garden going, you can harvest it from your current established plant.
This is good for people who live in zones that are suitable for artichoke because you can harvest it and collect it every season and increase your yield.
Established artichokes produce these offshoots that come up from under the soil. They’re also called “pups” or “cuttings” or “root divisions.”
Whatever you wanna call it, this is my favorite way of doing it because it gets you consistent results. Quickly.
The right time to harvest for propagation is when the established plant has been producing. Artichokes will generally produce a yield in their second year.
They rarely produce anything valuable in their first year of growing. If you have an artichoke plant that you’ve been tending for a few years now, it should be growing offshoots.
Before you do any cutting, make sure that you have adequate space and an area in your yard dedicated to your permanent home. You can read the later section for steps on setting up an artichoke garden.
Remove the offshoot (cutting)
When the offshoots are at least 8 inches long, they should be prepped for harvest. First, use a spade and gently dig up the soil around the area.
Use a sterilized pair of pruners (use rubbing alcohol) and cut it off cleanly. Don’t do this during the bright sunlight periods of the day. Wait for a day that has an overcast. The sunlight will burn the newly cut pups.
The best time to cut off the offshoot is during the winter period when the plant isn’t growing. This will avoid disturbing it in the spring or summer when it’s actively producing.
Be careful not to cut the roots of the offshoot, as these will be necessary to root it.
When people say they propagate artichoke by the crown or by cuttings, this usually means they use the offshoots.
Replant it
Now that you’ve separated the offshoot from the adult plant, you can replant it back to its home. Be careful not to damage the roots.
Pack the soil around the original plant carefully. Put it back to how it used to be with the same soil conditions and everything.
Clean it
The next step is to clean it. You don’t know what types of plant pests or microscopic viruses it harbors.
Take the artichoke and dunk it in a solution of vinegar and water in equal parts for a few minutes.
This will instantly kill the majority of pests that can be hiding in it. Since there are so many different crevices, they can be hiding anywhere. Remove all debris, dirt, labels, etc. Clean it as you’ll eat it!
Be careful not to damage the roots of it. If you cut off multiple offshoots, repeat the process for all of them. Let it dry before moving onto the next step.
Plant it
So now you should have a freshly cut offshoot artichoke. Find a good place to plant in your garden.
You can check out some of our tips in later sections on this page. But generally, you’ll want a fertile plot of soil
Each shoot should be planted at least 3 feet or more apart if you’re growing multiple artichokes. The soil should be organic if possible. The location should be sunny with plenty of photoperiods.
Water generously the first time, then water as you regularly should. The roots will establish themselves slowly over time. You can give your offshoot a gentle tug to see if it took root. If not, try again.
Note that artichokes need plenty of space to grow. So you should provide them with as much as possible if you want the best possible yield.
Congrats. You’ve successfully propagated artichoke using cuttings! That was easy. Don’t sweat it.
Growing from seed
If you prefer to propagate it from seed, that’s also a possibility with artichoke. You’re not limited to just using the root divisions (crowns) for propagation.
Seeds have always been an option, but it does take a lot more time and effort. But hey, some people enjoy it. It’s more rewarding, in my opinion.
Additionally, once you’ve propagated one from cuttings, it’s possible to collect the seeds from it.
Then you can grow from both seed and cuttings next season and try both. If you’re in the right zone, you can start sowing them outdoors directly into the garden. If not, start indoors as with most other plants.
Note that artichokes will take up to 180 days to fully become established, so you’re in this for the long haul.
Don’t expect instant fruiting as this plant will test your patience. If you’re in a warmer zone, it may be easier to just sow outdoors.
But for those with cold winters or limited periods of growing time, you should start indoors to protect it from destruction when the winter comes.
Here are some general guidelines on growing from seed:
Artichoke seeds will need to be cold stratified before you plant them. This is where they’re exposed to an artificial cold just like in nature when they’re dropped into the soil in the winter.
You can do this by taking them into a damp napkin and then wrapping them up with it. Then place the entire napkin into a plastic container.
This will stop them from drying out in your fridge. If they do, they might go sterile. Keep them there for about 2 weeks. Then you’re all set for the next step.
Start sowing them indoors about 2 months before the last frost in your zone. If you don’t know when this period is, look it up here.
Artichokes need good quality soil. You may be able to get away with cheap, generic brand soil.
But If you want the best possible yield with large, flavor-dense artichokes, use good quality soil. Opt for organic or natural soils.
Buy a seed starter mix and a growing kit. These are those trays that come with dozens of small compartments.
Place 2-3 seeds per compartment and fill with 0.5” of high quality, well-draining starter mix.
If you want to avoid transplant shock and you have a bit of a flexible budget for these guys, use a biodegradable set of pots.
They let you plant into the soil without having to dig them out. There are plenty of organic ones you can find on the market for a slightly more expensive price.
Note: Artichoke doesn’t germinate easily. Expect poor germ rates so plant extra seeds per compartment.
Water generously the first time, then reduce watering to only when moisture drops.
Use a spray bottle to mist them, but not soak them.
Keep the starter kit in your house near a sunny window with filtered sunlight. Don’t put it directly under the sunlight.
Cover it with a humidity dome to retain moisture and help germination.
The seeds will sprout in temperatures between 60-80F. Aim to keep it between these values for successful germination.
If temperatures are too cold, use a small heating pad or a heat lamp to keep them warm during the day.
For direct sowing, keep the temperatures around 70F or higher. You can use a soil meter to check the exact temperature of your soil. Avoid planting outdoors if your temperatures are unstable or dip below 20F. This will kill the seeds.
When they sprout, remove the humidity dome and continue watering as needed.
Artichoke seeds generally germinate within 21 days or so, depending on local conditions like temperature, water, light, etc.
As they sprout, continue to water them until they’re about 3 inches in height. Start thinning them and keeping the bigger plants in each compartment.
Snip them off with a sterile pair of scissors. Each pot or compartment should just have a single artichoke plant or else they’ll compete.
When two sets of true leaves have come about, it’s time to move them to your garden. An easy way to tell is to measure it. It should be at least 7 inches by this time or taller.
Choose a location in your garden after the last frost that’s bright and sunny. Keep away from drafts, poorly draining soil, windy places, or areas that get a lot of shade during peak hours. Artichoke is a full sun plant and this is necessary for the best yield.
You may end up with thin yield and leggy plants if you plant them somewhere that has partial sunlight.
If you’re directly sowing the seeds, allow 2-3 seeds per 0.5” depth every 5 feet in distance.
Some cultivars will take up to 8 feet of space per plant. So be sure to do some reading on your specific species before you plant.
For those in regions that receive strong afternoon sun, partial sunlight can be helpful to stop scorching.
Plant in organic well-draining soil. Each artichoke should be placed 3 feet apart to minimize competition between each plant. If you don’t know your soil conditions, use a soil meter to test them.
When transplanting artichoke, measure the top of the root ball to the garden soil’s level surface.
The top of it should align evenly with it. You can give it a firm press to level it properly. The soil surrounding it should be firm and rigid. Water it to loosen it so you can mold it to the shape of your root ball.
By transplant
Transplanting is as basic as it gets.
If you have a local nursery that sells artichoke plants, this is a proven way to get it going without having to cold stratify, germinate, and do all that other jazz on your own.
Sure, you pay a premium for it, but you also save time plus maximize your chances of success.
Note that many artichokes you buy from the garden center at your local hardware store won’t produce any veggies in the first year.
Artichokes generally produce only during the second year when the flowers come out.
Plus, they need to go through vernalization to produce flowers. This is when they require a period of cold exposure just like they do in the great outdoors.
Plant them to exposed temperatures between 30-50F for best results. They’ll slowly acclimate to it.
Watch out for pests and signs of plant damage. When they harden off, they’re vulnerable. After that, they should be OK. You can use a greenhouse if you have one to slowly harden them off.
Plant them in proper soil conditions. Each plant should be planted 5 feet apart and dug to a hole that’s just the same size as the original pot it came in. water generously the first time, then reduce as they become established over time.
The younger the plant, the more dangerous the temperature can be. Utilize cold frames or row covers to protect them from the winter. Use mulch around the base of the plant to help insulate it.
Warmer weather is definitely easier.
Basic artichoke care

After you’ve germinated or rooted your artichoke, you’ll need to care for it properly so you get the most yield out of your labor. Here are some tips for artichoke care.
Hardiness zones
Artichokes are vulnerable perennials that grow best in USDA hardiness zones 7-11.
They can, however, be grown outside of their hardiness zone provided that you give them the right environment for them to thrive. People have had success growing artichokes in greenhouses, kitchens, and even in their garages.
Even if you’re situated outside of zones 7-11, you can still grow them as an annual rather than a perennial.
This means you’ll need to plant them again every year, but at least you’ll know how to grow an artichoke from an artichoke so you can harvest them over and over to your desire.
Soil
The soil should be fertile, well-draining, and has a large plot size. Each plant will need 3-6 feet of space.
So be sure to accommodate for this because it can be difficult with a tiny garden. They’re wide-growing plants that will compete for soil if there are not enough nutrients to go around.
Additionally, artichokes will grow like weeds once they get going, so provide lots of space and use a solid barrier so they don’t get to other plants in your garden. Use organic or natural soil that receives full sun all afternoon.
They’re heavy feeders that prefer rich soils with compost or manure added to the top 10” of soil. Artichoke growing can be labor intensive if you’re scaling up, but if you’re just doing one or two, it’s quite passive.
Soil can be anything from clay, sand, or loamy soil. It just needs to be rich and drains well. That’s what you need to know.
If it doesn’t drain well, you can amend it with manure or compost to help improve drainage.
Try to get soil that doesn’t have too much salinity (salt). Although they can tolerate different soil types, they don’t like salt!
Soil pH
Aim for a pH between 6.0-7.5. They prefer slightly acidic to neutral soils.
Some types like alkaline soils. It all depends on what you’re growing.
But they’re pretty lenient on the pH.
Watering
Watering will vary depending on your local climate and the cultivar you’re growing. For drier locations, you can water daily during the summertime.
Avoid absolutely soaking the soil. But they do need plenty of water to thrive. Use a wand, not a hose.
Note that seedlings require more water than adults.
When the plant becomes established, you don’t need to go crazy with the watering schedule. You’ll get a feel for it. Then you’ll learn how much to give them each session.
Consistent watering is a must and this will determine the overall quality and quantity of your seasonal harvest at the end of the year.
Like most people say, the more tender the artichoke is, the higher quality of the yield is. The more water you put in is determined by the sunlight, temperature, and soil conditions.
Artichokes generally need watering 2-3 days per week. Aim for 2 inches of water per week. Use a water meter to check for precise measurements.
If you live in a hotter zone, increase the watering frequency. If it’s a hot day, increase the watering frequency. If it rained, decrease it. It’s very nuanced.
If they’re poorly hydrated, you can expect tough veggies. They may also develop a black part on the foliage, which is a sign of water issues.
Fertilizing
Artichoke will need a bountiful supply of plant food to grow optimally.
You’ll want to do some research on this so you pick out the right type for your cultivar. It also depends on your local growing conditions and current soil profile.
If you don’t know your soil’s nutritional profile, get a soil test kit and find out. This will save you time from getting something that’s not lacking in your soil column.
For a cheap fix, manure or compost will do your plants well. You can also use a balanced organic plant food (NPK 5-5-5) suitable for artichokes or general organic gardening.
Humidity
They grow in a variety of conditions but prefer higher humidity. Hot and dry weather will make them stiff and firm, which can result in hard vegetables.
They may also become less tender because their bracts are forced apart from the dryness in the air. Try to control the humidity by using proper watering frequency. You can also use humidity dishes or domes to DIY it.
These can increase the overall moisture content in the air surrounding the artichoke. Don’t overdo it, because this can bring in pests or rot, which will damage your yield.
Temperature
Artichokes are afraid of cold climates, which can kill the younger plants.
However, they’re considered a cool weather plant- NOT a cold weather plant.
They thrive in ranges between 60-70F during the warmest part of the day. At night, they can tolerate temperature drips as low as 20F for most species.
Cooler summers are ideal for them. Warmer zones should exercise partial sunlight.
Sunlight
They require full sun for at least 6 hours per day.
Cool-weather regions will do fine in direct sunlight. Hotter zones can do away with it and use a partial shade or strategic planting.
Plant around other objects to shield them from the scorching sun in the afternoon hours.
Vernalization
Remember that artichokes require a period of cold exposure in the winter.
When you overwinter it, leave it exposed if the cold won’t kill it. If you’re in the right zone, it should be no problem.
They need up to 1200 hours or more of cold exposure each season for proper propagation. Most artichoke plants can handle 20F dips in temperature.
If you expect it to be even colder, add row covers, mulch, or use a greenhouse if possible. You can also build a DIY cold frame. Or bring it indoors if your plants are potted.
Pruning
Artichokes will need regular pruning, in addition to harvesting on time. If you wait until they’re overripe, this can introduce bugs to your garden.
They will require some maintenance when grown as perennials. Pruning isn’t necessary unless the humidity is too high or you’re dealing with a pest or rot problem.
Otherwise, let them grow.
If you harvest it in the early spring, pruning will help get you a second round of crops in the fall or late summertime. This only works if you’re located somewhere with a growing period long enough to do so.
If not, then it’s best to wait until the fall to prune your plants for the winter. Annual artichokes don’t need to be pruned. Perennials should be pruned for overwintering.
Staking
If your artichoke starts to lean over, stake it.
Some taller variants will require staking to stay upright.
When you dig the stake into the soil, don’t damage the crown or roots. They can be right at the surface level so just be wary.
Mulching
Now and then, you’ll need to mulch your plants. When the seedlings grow a few pairs of leaves, they can use some mulch.
This will shield them from temperature swings and conserve water which reduces your watering needs and saves your utility bill. Mulch may also kill weeds and keep them cool and stable all year round. Think of mulch as insulation.
It’s good for them and costs nothing. Cheap straw mulch can be had for a few bucks a bale.
Weeding
When artichokes grow, they’ll become established in the environment and get all the soil, water, and sunlight they need.
But when they’re still young plants, they compete with weeds and other veggies for resources nearby.
You should remove any weeds or plants that are unnecessary to minimize the competition and let them grow to their full potential.
That old decorative plant that you don’t care about anymore? Pull it!
If you pull them out, this will help get more nutrients just for your artichoke veggies, which will help benefit them to produce more yield.
When they become bigger and resilient, then they may handle the weeds themselves! It’s awesome to think about because it means they take care of themselves passively without your input.
Pests
While artichoke may be resilient to many things and grow like crazy, it’s not pest resistant.
Sadly, there are many bugs that’ll gladly gobble on the tender foliage. It’s up to you to kill and prevent them from destroying your harvest.
Here are some of the most common bugs you’ll find and how to get rid of them.
Gastropods
These slugs and snails. They eat the leaves when they’re young and tender because they’re easy to digest. They can be controlled by setting up a beer trap, using slug bait, or manually removed.
Moths
Moths will eat artichoke and other thistle plants. The plume moth is a light brown moth that deposits eggs all over the plant.
The small larvae look like worms and they eat the leaves. You may notice skeletons or veiny leaves. They can be controlled by manual removal, pruning, or planting other moth repellent plants like cilantro.
Bt can be used as a last resort, which is a bacterium that naturally kills the larvae. Use as directed.
Aphids
Aphids are everywhere, and this plant is no exception. If you see aphids, you should immediately spray them down with a hose.
This will remove them in huge numbers. Afterward, set up sticky traps, bait stations, and continually spray them to get rid of them over time.
There are many guides online you can reference to get rid of aphids.
Diseases
There are just a handful of plant bogies that can destroy your artichoke.
Thankfully, they’re easy to prevent if you regularly take good care of your plants. The most common ones are powdery mildew, Botrytis, and root rot.
Damping off
This is the most common one that I see in the home garden. When young artichokes emerge from their soil pits, they suddenly wilt out of nowhere.
This is usually due to a previous infestation that sprouts when humidity is high and this gives rise to rot. This is why it’s important to keep it well aerated and pruned to allow for evaporation.
Curly dwarf virus
If your artichoke has patchy leaves, it may be because of this artichoke virus. It should be pruned immediately and then disposed of.
Use sterilized pruners to remove any nested foliage. Do not try to propagate or harvest any artichokes infected with this virus.
Growing artichokes in pots
Artichokes can be grown in pots or containers, but you need to use a big pot that’ll accommodate its size.
For larger cultivars, I’m talking about a container that’s at least 3 feet wide and 1 foot deep. This isn’t your typical veggie that’ll do fine in a small plastic container. No way.
You’ll have to use a very good quality soil that’s well draining, because with a pot of that stature, it’ll become clogged over time with poor quality soil.
Additionally, add fertilizer to it as you seed so you don’t have to do it later. The pot should have multiple drainage holes and you can add a layer of rock to prevent clogging or buildup.
When growing in a pot, watering becomes more critical as you need to do it more often. You should also never overfeed, overwater, or add any soil amendments that aren’t necessary.
Otherwise, care is the same as soil planting. The pot gives you the ability to move it around if its on a plant stand with rollers.
Overwintering artichokes
Artichokes need to be overwintered if the temperatures outside drop to 20F or lower. They don’t tolerate the cold well and it can severely stunt them.
To overwinter, cut down the leaves in the fall before winter comes. It should be cut down to the soil level. This should be done before the frost.
Next, add some mulch to help insulate it. A few inches of it will do. Cover the entire plant crown and the surrounding areas.
If it’s extremely cold, you’ll need more mulch. Once covered, block off the area so you don’t trample it accidentally later on. Use a stake or marker to do so.
After winter is covered, remove the mulch.
Harvesting
Harvest when the bract on the lower part of the bud starts to part. If you’re in a warmer zone, you’ll have extended periods of harvest.
It’s possible to get two harvests per season.
Otherwise, you’ll get a single harvest if you’re out of the hardiness zone or in a colder region. You can leave 2-3” of stem attached to the vegetable. The stem can be eaten.
It depends if you’re growing it as an annual or perennial, which is governed by your hardiness zone. Remember that it grows best between 7-11. If you don’t know your zone, it’s easy to look it up online.
Smaller buds that sprout on the sides can be harvested as well. This is where baby artichokes come from. Harvest on time to ensure a tender and juicy yield.
If you miss a harvest, it’ll become hard and tender. Each yield can produce up to 10 or so buds per plant. Developing buds should be saved. Fully grown buds can be harvested at the same time as the baby ones.
Storing
You can store it in the fridge using airtight containers in the crisper. Artichokes can also be dried by dehydration and then stored with your dried goods.
For best results, consume them immediately after you harvest them. They can be stored up for a week in the fridge.
There are some more fancy methods of preservation like oil storage:
Companion plants
Some plants grow well with artichokes such as cabbage peas, radish, asparagus, sunflowers, tarragon, and some herbs.
These can help complement artichoke and won’t compete for nutrients. Artichokes will need rich soils, and all of these won’t hog it all up.
For best results, let artichoke grow in its plot. They have similar nutrient needs so the same soil will suit them all. Radish and asparagus both are excellent choices to grow next to it.
Best uses
Why would you want to grow artichoke?
Because of the ‘choke! These little things can be used for a variety of purposes, like culinary recipes, especially those that are Mediterranean. You can use it roasted, stuffed, put it in stews, soups, or even eaten raw for those health nuts.
Artichokes are a good source of fiber, folate, potassium, magnesium, vitamin c, and more. Or you can keep it simple and then steam and serve with some vinaigrette on top.
The artichoke can be eaten with many different combinations of food, such as grilled chicken, cheese, garlic, sea salt, olive oil, rosemary, honey, capers, or even just plain butter. Artichoke is overlooked. But it should be.
Other common questions
Do you have more questions about caring for artichokes? These are some common questions asked by readers that you may find helpful:
How do you start an artichoke plant?
You can start your artichoke plant in one of three ways:
- Propagating from seed
- Propagating from root cuttings, scraps, or offshoots
- Transplanting
No matter which one you choose, the important part is to take care of it when it’s small.
The seedlings can be easily killed by plant viruses, weeds, or damping off.
After they grow up, artichoke plants are resilient and can withstand some degree of drought, temperature fluctuation, and weed control.
See the above sections for more info.
Why are my artichokes so small?
Smaller artichokes may be due to plant fungus, pests, or failure to provide the basics of artichoke care.
Check your sunlight levels, supplement with plant food, and provide 1-2 inches of water per week during peak season.
Examine for signs of pest problems and rid them. Check for signs of powdery mildew, root rot, or other plant pathogens that may be present.
Do artichokes need full sun?
Yes, artichokes grow best in full sun.
Unless you’re in a region with hot summers, you should plant in full sun for the best yield. Hotter regions can do well with partial shade to prevent plant scorching.
Should I soak artichoke seeds before planting?
This will benefit the seeds and help increase the germination rate. Artichoke seeds need a period of damp, cold stratification to grow.
But that doesn’t mean you need to soak and wait. You can wrap them in a damp towel then get on with it.
What part of the artichoke is poisonous?
Artichokes aren’t poisonous but do have parts you shouldn’t consume. The choke itself is the hard, hairy pod inside the leaves.
It’s not harmful, but it does pose a choking hazard (no pun intended).
Because of this, you should avoid eating the choke itself and only consume the tender leaves, stems, or roots.
Different recipes call for different parts of the vegetable.
Depending on what you’re doing with it (brewing tea, cooking, etc.), it all changes completely.
For most dishes, you’ll be only using the edible leaves and throwing out the choke itself. Peel off the leaves and use those.
What can you not plant next to artichokes?
Avoid planting anything dependent on nitrogen (N). The artichoke will likely compete and drain other plants of their necessary nutrients.
For best results, you should plant artichoke by itself (each plant evenly spaced) in rows with no other plants nearby, unless they’re for pest repelling reasons. This will get you the best yield and prevent competition.
Don’t plant tall plants, because they can block sunlight that the artichoke needs. Avoiding veggies that require a high nitrogen supply is a good rule of thumb.
Don’t plant swiss chard, bok choy, Brussel sprouts, cauliflower, potato, leek, broccoli, or tomato near artichoke.
Do artichokes come back every year?
Artichokes are a perennial, so they’ll naturally grow and propagate every season and come back on their own if you’re growing in the right zone.
If not, you can grow them as an annual vegetable and harvest the offshoots to prepare for next year.
Are artichokes easy to grow?
Artichokes are very easy to grow once they become established.
This will take time and it’s a relatively slow-growing plant. But once you get it going, it takes care of itself.
They’re a good project for beginners and those who want to grow something they can eat. Brownie points if you like artichoke.
Compared to other thistles, artichokes do require a bit more TLC.
Further reading/references
You may find these resources helpful in growing artichokes:
- First year growing artichoke! : gardening – Reddit
- How do you grow artichokes here?? – Houzz
- Artichoke in the Garden | USU
Grow your artichokes!

Now you know how to propagate and regrow artichokes on your own.
So go forth and do it. These little buggers aren’t a favorite to most, but for those that do enjoy them, they’re quite rewarding to grow.
What do you think? Do you have any questions? Post a comment and let us know. If you have any tips to share, please leave them down below in the comments as well.

I’ve always been interested in gardening, but I never took it seriously until I was forcefully gifted an orchid. This was what got me into the hobby and I’ve never looked back. I enjoy writing about it, but not nearly as much as getting into the dirt and sculpting the perfect decorative ornamental to enjoy for the times.